Here's my latest project for the new shop, a storage cabinet. The pre-fab erector-set type shelves and stuff felt flimsy and cheap even though they are not at all cheap. Therefore I decided to build my own enclosed cabinet vs.just open shelves to keep all the dust and crap off of the stuff that is being stored.
Of course I started with an idea and then a drawing. Finally two weeks ago I was off to Lowes and the adventure began. I got everything back home and the saw dust started to fly.
The idea was to use basic 2x4 construction for the vertical corners, with MDF shelves, and whatever design I could come up with for the doors. I finally decided on a 8 foot tall x 4 foot wide x 19 inch deep cabinet with 4 doors.
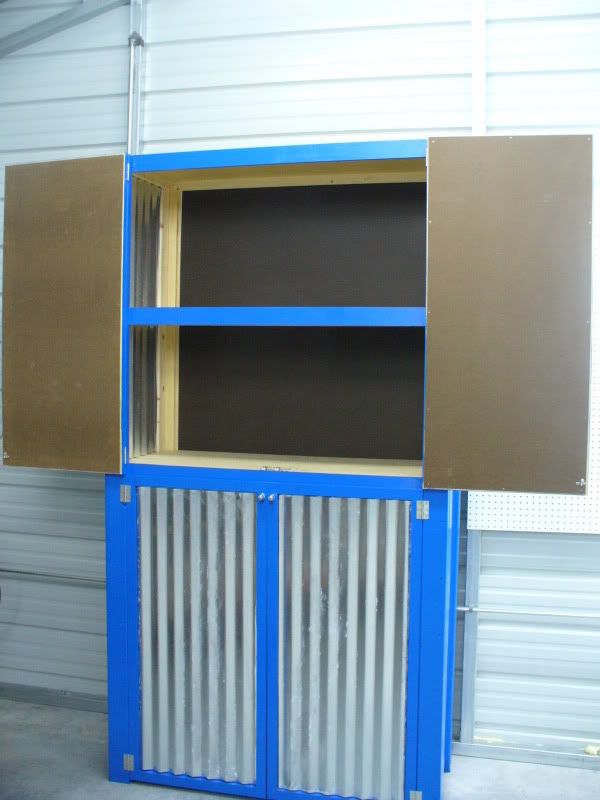
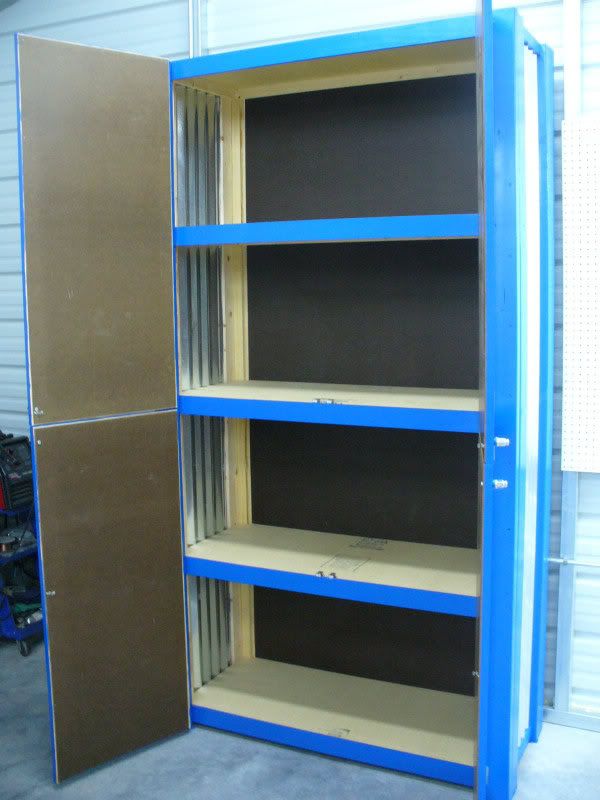
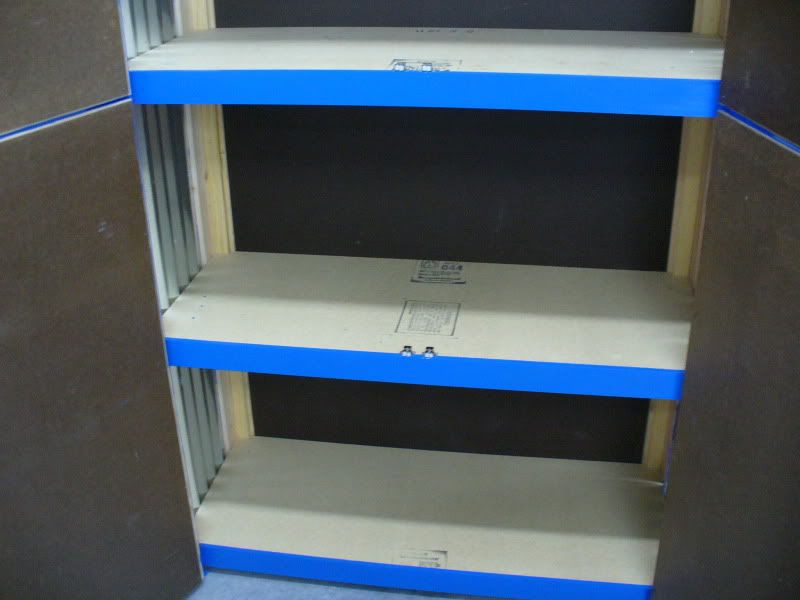
First I pre-drilled the (8) 2x4s and assembled them with 3" long screws to make 4 vertical legs to form the corners. For the 5 shelves (including the top) I used 5/8" thk MDF and attached 1x2s to the perimeter forming a 'tray' to make the shelves much stronger. I borrowed a co-workers pneumatic brad nailer to attach the 1x2s to the MDF which really made it easy. Once the shelves were built, I slid them in between the vertical corner legs and screwed them all in place. Next I attached the back 3/16" thk hardboard with 1/2" brads to square it all up. Early on I had decided I wanted an 'industrial' look so I decided to integrate 2" corrugated galvanized roof sheets into the design. I wanted to use this for the sides and the door faces.
With everything done, minus the doors, it was time for paint. I liked the blue color on the new lift so off to Sherwin-Williams I went to get the paint. I told the guy what I wanted and allowed him to mix it up before I asked the price...big mistake! $53 for a single gallon of paint, that shit must have gold flakes in it! Oh well, live and learn. The good news is I have enough to paint every piece of wood I decide to add to the shop in the future. The wife likes to paint so I decided to let her help. She worked on taping and painting the cabinet frame while I worked on the door frame design.
I'm new to cabinet building, but luckily there is lots of info on the internet and I discovered a technique of making doors and face frames using "pocket holes". I found these are made using a special jig by "Kreg" so I went to Lowes and bought one. I'd have to say this thing works 100% as advertised! You can assemble four 3/4" thk 1x2's into a perfect door frame in about 10 minutes. The kit comes with the jig, special drill bit, stop collar, Allen wrench, all in a nice case.
Once I made the door frames, I added a back and Sonya painted those as well. All that was left was to add the corrugated metal inserts and hang the doors. I used construction adhesive to attach the metal and the doors were ready to hang.
OK, I know, blah, blah, blah...just show me the damn pics right? Alright here we go:
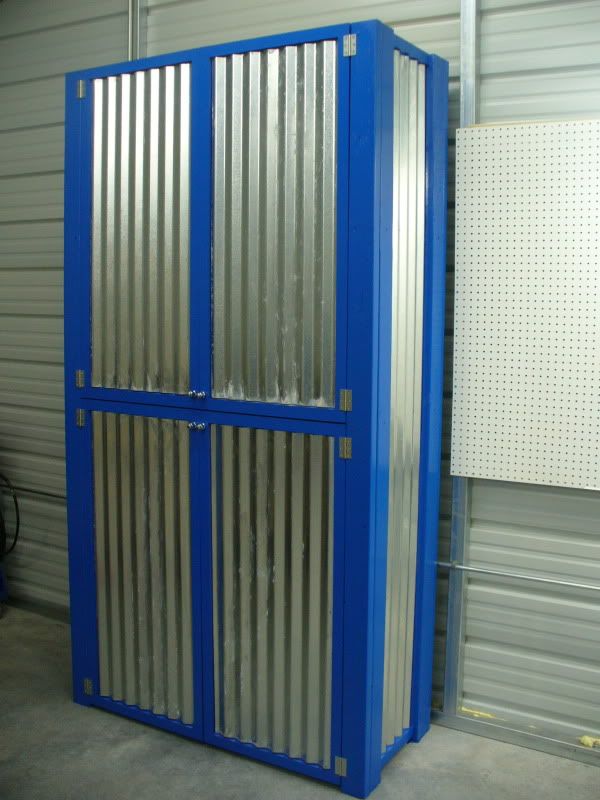
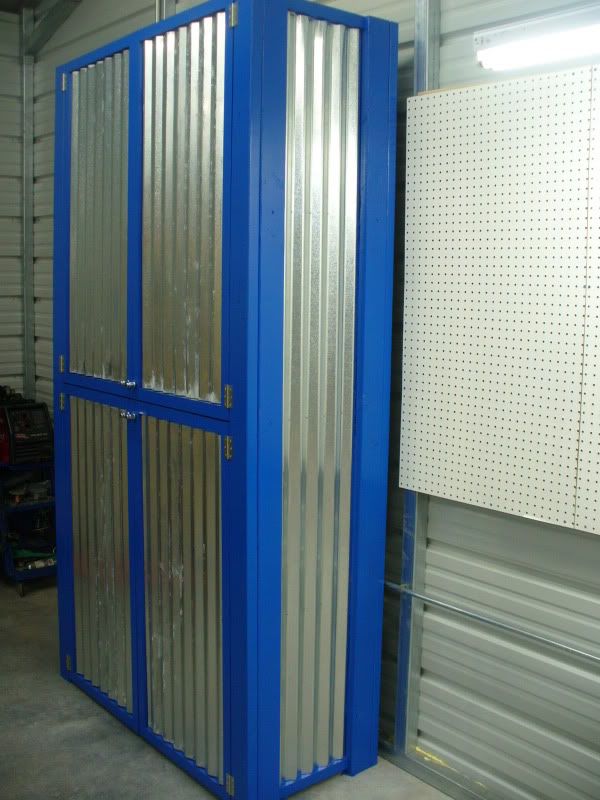
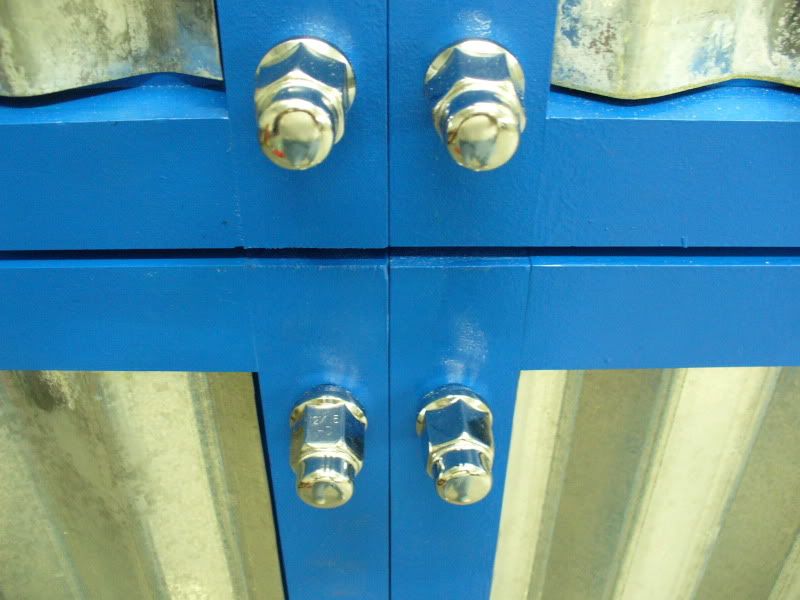
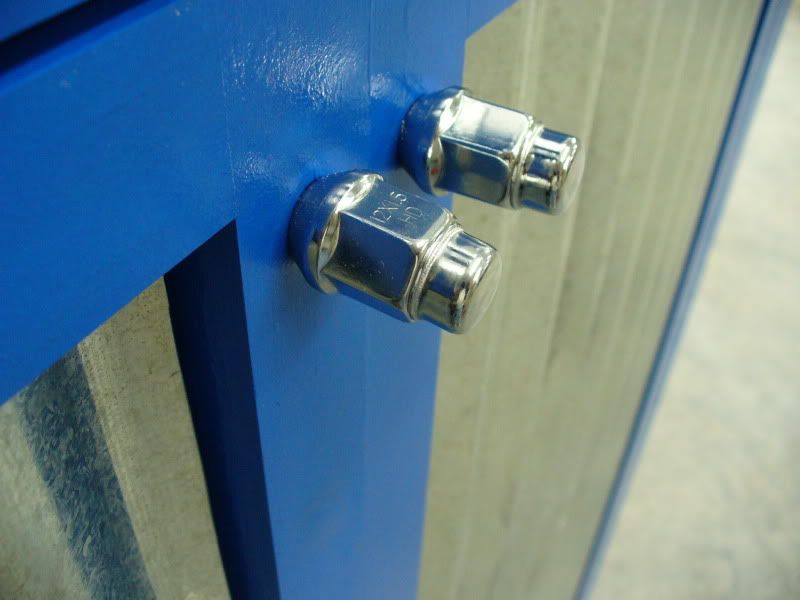
For the final touch I decided to use lug nuts for the door pulls. Since it seemed silly to drill a 1/2" hole to use a lug stud, I used the vise and pressed in a 1/4"-20 nut into the lug nuts so I could attched them with machine screws from the inside. I think they look kid of cool.


 A palace like that will draw in friends you didn't know you had . . . BTW, when's the garage-warming party? We are friends, right?