As part of working on the 914, I am refurbishing the front suspension which is assembed from select parts from mid 1970's to early 1980's 911s. The struts themselves are OEM Koni style (which is actually not that common, but not rare either). I had wanted to powder coat much of the suspension as well as try to roughly match the Koni "Red/Orange" color of those struts.
Over a year ago, I aquired a powder coating kit from Caswell
http://www.caswellplating.com/ but have never gotten around to using it. I also managed to loose the instructions from Caswell, so I had to piece together how to do this from various online "how to powder coat" pages. Also about a year ago, I had picked up an old electic oven from the Durham County Landfill transfer station. It is now in the garage and setup as a powder coating oven.
Anyhow, it seems to be much easier than I expected and I am very happy with the results. I used the following basic process...
1. Clean part to remove as much paint, grease and oil as possible. This was done via paint stripper, mechanical scraping and brake cleaner.
2. Media blast part.
3. Wash in soap and water to remove any remaining oils, blasting residue, etc.
4. Treat with Ospho/Metal Ready to convert the top layer into Zinc Phosphate.
5. Rinse with water
6. Pre-heat to dry as needed and let cool.
7. Pre-heat oven to around 400 F.
8. Powder coat part using Caswell tools.
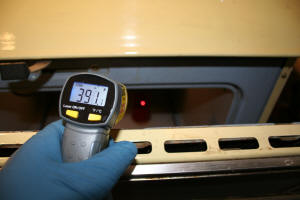
9. Put in oven and use IR thermo to measure part temp.
10. Depending upon part size, it took about 2-5 minutes for it to get up to about 350+ F and around this point the powder started to melt, flow and turn glossy. Shortly after this part was 390-400 F.
11. Let cure for 10 minutes at around 400 F (Powder listed 392 F @ 10 minutes).
12. Turn off oven, crack oven and let it cool slowly down to point that it can be handled and then remove from oven.
You can find much of the same info on my
914 page, but with higher resolution photos. Anyhow, here are some photos...
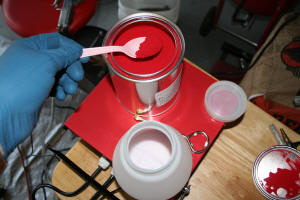
Filling the cup with powder. I only put about 1" in.
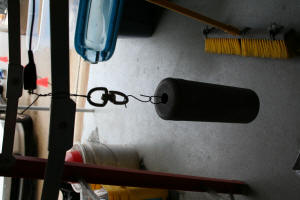
Part ready to coat. It is the strut dust cover. It is hanging from a swivel so I can rotate the part as needed. You can see the ground clip on the top.
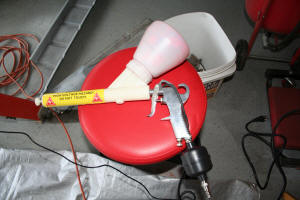
"Corona" gun all ready to go. The gun gives the powder a positive charge and a low pressure air flow pushes the powder out of the nozzle. Powder is then attracted to the grounded part
Coated part. Powder could be brushed off at this point. It is only held on via electrostatic charge. You can see that it has a "flat" appearance as this is uncured powder.
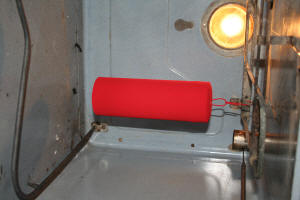
Part has been carefully transferred to the pre-heated oven.
After closing the oven door, you can see the part warm up, the powder starts to melt and the surface goes from flat, to matte to gloss. At this point the part should be up to cure temp. But you should crack the door and check with IR thermometer. Keep at cure temp for specified time. After cure time, turn off oven, crack door to allow temp to slowly drop (not quickly)
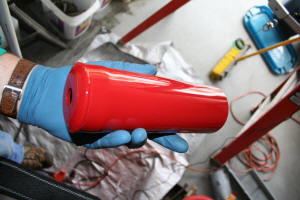
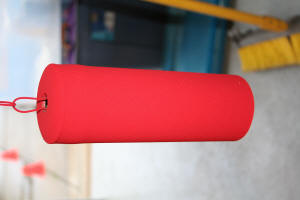
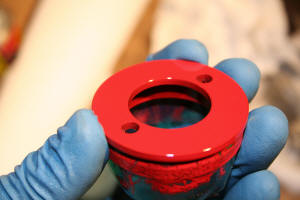
Here is part after it is all cool. This powder gives a gloss finish.
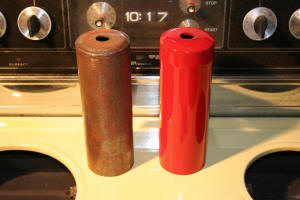
On left is part that was stripped with paint stripper, but has not yet been media blasted. One right is finished example.
If you have parts that have threads, holes or mating surfaces that you don't want to be coated, you can use special silicon plugs for hole and silicon tape for threads or surfaces. Here is a gland nut for the top of the strut. I have used green high temp silicon tape to cover the threads. Some cured paint is on the tape, but the tape peels right off and the threads are unpainted.
If anyone has experience with this and I am passing along bad tips, please let me know.

I could type up something for Heel and Toe if anyone thinks this might be a good article.
_________________
Richard Casto
1972 Porsche 914
2013 Honda Fit Sport
2015 Honda Fit EX
http://motorsport.zyyz.comMoney can't buy happiness, but somehow it's more comfortable to cry in a Porsche than a Kia.

